

How to Sharpen a Hunting Knife That Stays Sharp All Season
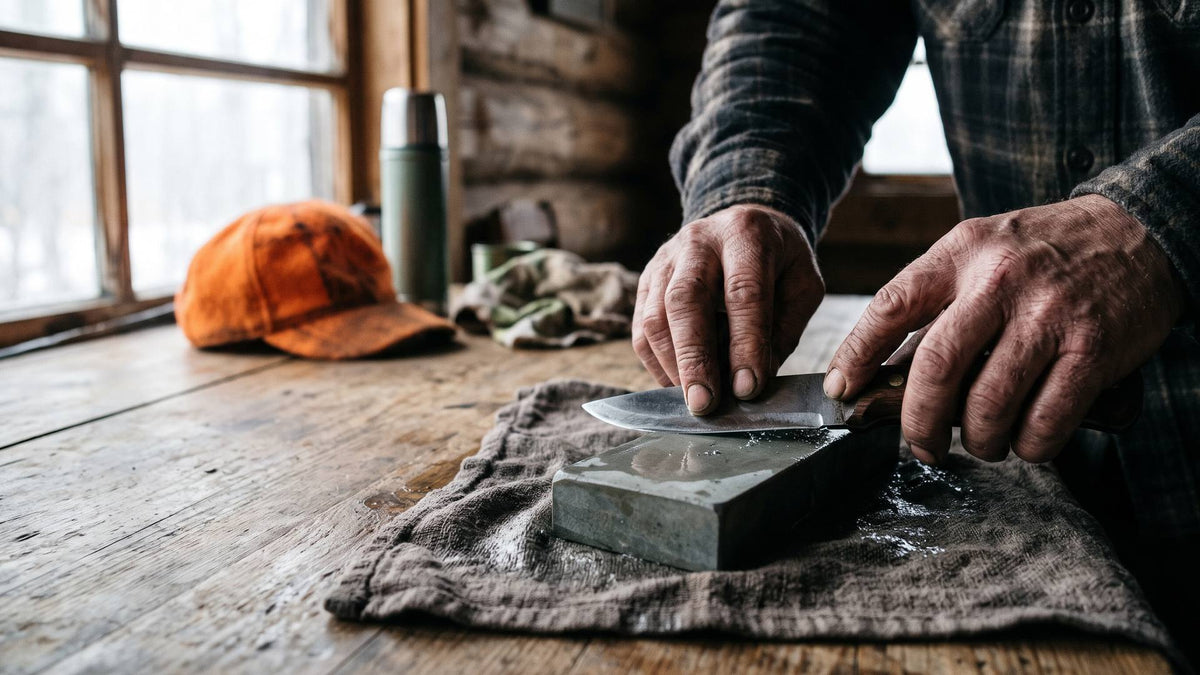
How to sharpen a hunting knife is one of those jobs that gets put off. Same as cleaning the rifle, really. You know you should, then it's late, you're tired, the knife goes back in the drawer... and three weeks later it's tearing at a roe deer's hide instead of opening it. That's the moment people press harder. And that's the moment blades slip. This piece walks through the stone, the pocket sharpener and the emergency fix for when your fingers are numb and the car's half an hour away, plus angles, the burr, Morakniv's Scandi grind and gut hooks. Crocodile Dundee won with the bigger knife. Out here, the sharper one wins.
TL;DRCopy the angle your knife came with (a marker shows you what it is). Grind until there's a burr all along the edge, then knock it off with a few feather-light strokes, one side then the other. Out hunting, little and often beats waiting for a blunt knife.
Honing or sharpening: why a knife goes dull
An edge dies in one of two ways. Sometimes the thin edge just rolls over to one side, because the blade clipped a bone or you spent ten minutes working through the hide of a wild boar. Other times it's simply worn, ground down and rounded off over a season. A rolled edge only needs honing. Worn is different. There's no straightening a worn edge back; you have to take a little steel off and build a new one.
Which have you got? Takes ten seconds to find out. Point the edge at a window, or at the headlamp you've probably still got on, and look straight down at it. A sharp edge shows you almost nothing. A dull one throws back a thin bright line, or a few bright dots where it's damaged. A few dots? Ceramic will sort that. A line along the whole length means it's stone time.
What angle should a hunting knife be sharpened at?
Annoyingly, it depends who you ask. Morakniv recommends 23–35° in total for its hunting and outdoor knives, which works out at roughly 12–18° on each side. Sharpener makers like it steeper. Accusharp's 5-Stone kit, for one, puts 25° per side down as a robust working edge.
Notice the two ways of counting. A "total" angle covers both sides of the edge; a "per side" angle covers one. People mix these up all the time and end up sharpening at twice (or half) what the maker intended. Shallower cuts sweeter but wears quicker. Steeper takes the abuse: bone, gristle, a bit of wood, all the stuff a gralloching knife runs into.
Our advice? Don't overthink the number. Whatever the knife left the factory with is the angle to keep, and a permanent marker will show it to you (Morakniv suggests the same trick, funnily enough). Scribble over the bevel, take a couple of light passes on the stone, then look at what's rubbed off.
- Ink gone only at the very edge: you're holding the blade too steep.
- Only the top of the bevel wiped clean? Too flat.
- Ink gone evenly across the whole bevel: that's your angle (hold it there).

No marker in the house? Old trick: blade straight up on the stone, that's 90°. Halve it by eye to 45°, halve again to about 22°, then drop a hair lower. It's rough, but it gets you close.
How to sharpen a hunting knife with a stone, step by step
The stone is slow, we won't pretend otherwise. It's also the most precise method, it brings back even a badly neglected blade, and it's where anyone learning how to sharpen a hunting knife should start. Wet it or oil it according to whatever came on the box (there's more on that in the FAQ).
A word on not cutting yourself, because people do. The stone goes on something that won't slide about; a damp tea towel underneath works fine. Fingers stay out of the line the edge travels. If you're holding a pocket stone in your hand rather than resting it on a bench, wear a cut-resistant glove. And once it's sharp, it goes in the sheath.
- Wipe the blade first. Old blood and fat gum up a stone faster than you'd think.
- Coarse side up. Set the blade on it at the factory angle.
- Pull it across from heel to tip, light and steady, and stop while the tip's still on the stone. When you hit the curve, lift the handle a touch so the belly gets its share.
- Keep working that one side until there's a burr along the whole length of the other side. Not most of it. All of it.
- Flip the knife and do the same until the burr moves back.
- Now the finer stone, with less pressure. On the Accusharp 5-Stone kit that means starting on the 120 grit and working your way up.
- Finish with a handful of very light strokes, swapping sides each time, to get rid of the burr.
The burr: how to feel it and remove it
Grind all the way to the edge and a thin lip of metal curls over onto the far side. That lip is the burr, and honestly, it's the only sign worth trusting. You can admire a shiny bevel all evening; without a burr, there's no new edge yet.
To check for a burr, draw a fingertip across the edge, from the spine side towards the edge. Never run your finger along the edge. Burr only near the heel? You've skipped the belly and the tip. No burr anywhere means you're not done, or the angle's off.
What's left after the fine stone comes off on a leather strop. At the lodge, a few sheets of newspaper on a hard table will do the same job. Pull the blade spine first, never edge first, or you'll slice the strop.
How to use a knife sharpener
Realistically, this is what you'll have in your pocket. Pull-through and pocket sharpeners are the quickest way to get a working edge back, and a lot of them have two slots: a coarse one (carbide or diamond) to set the edge and a fine ceramic one to clean it up.
- Blood off, blade dry. Then start.
- Properly blunt? Coarse slot. Just lost its bite? Skip straight to the ceramic.
- Draw the knife through one way only, heel to tip, barely any pressure. Leaning on it doesn't help; the sharpener's doing the work, not your arm.
- A few passes, then stop and check. More isn't better.
- A few passes through the ceramic to finish.
The Accusharp Knife and Tool Sharpener works the other way round. You keep the knife still, edge up, and run the sharpener along the blade 3–4 times. The big handle and guard are there for your fingers if it slips.
Carbide eats steel quickly. Late in a long day, with a working knife, that's exactly what you want. A thin premium blade or a Scandi grind is a different story, though; keep those for the stone.
Guided stone kits and electric sharpeners
If your hand wanders halfway through a stroke (most people's does at first), let a guide or an electric sharpener hold the angle for you.
The Accusharp 5-Stone Precision Kit clamps the blade and guides the stone at one of six angles. Set it, start on the coarsest stone, and lighten up a bit with every finer one. There's a ceramic V-stone in the box for serrated edges too.
The WorkSharp Knife & Tool MK II is a different animal: belts, not stones. Feed the blade through its guide at an even pace, gently, heel to tip. Don't park it in one spot. Belts get hot fast, and overheated steel loses its hardness for good.
Morakniv and the Scandi grind

Most Morakniv knives have a Scandi grind: one wide, flat bevel running right down to the edge, with no second, narrow bevel on top. Which is good news, really. The bevel is the angle, so there's nothing to guess.
- Lay the bevel flat on the stone.
- Rock the blade a little, up and back, until it settles. You'll feel the whole bevel sit down flat, almost a click.
- Hold it right there, thumb on the spine as your reference, and take long strokes on a slight diagonal.
- When you feel a burr along the whole edge, sharpen the other side.
- Finish on a fine stone and the strop.
Going round the belly, raise the handle; twisting the blade is how people round off a Scandi. And keep it away from pull-throughs and clamp guides, which tend to grind a second, different angle onto that lovely flat bevel. A flat stone suits a Mora best. Bonus: that wide bevel shows exactly where steel is coming off, which is why a Morakniv is the easiest knife to learn on.
Serrated blades, gut hooks, and hatchets
How to sharpen a serrated knife
One scallop at a time. Take a tapered rod thinner than the scallop, work only the bevelled side at its angle, and finish with a single light stroke on the flat side to lift the burr off. It's fiddly. Do it at a bench, not by headlamp. The Accusharp 4-fold has a retractable tapered diamond rod for exactly this.
Gut hook
Same job as a serrated edge, only curlier. Grab a round or tapered rod that fits inside the hook, diamond if it's gone dull, ceramic if it just wants freshening. Work the inside only, short strokes, all the way round the curve. Burr on the back? Lay the rod flat on the back of the hook for a stroke or two and that's it.
Why bother? Because a sharp hook unzips the belly cleanly. A dull one drags, and a punctured gut puts bacteria all over the meat, which then spoils faster.
Hatchet
Hatchets are easy: the Accusharp Knife and Tool Sharpener handles them, or put a coarse P80 belt on the WorkSharp. Then sheath it. An axe bouncing around loose in the boot won't stay sharp past the first bend in the road. If yours is the Böker Plus Appalachian axe, there's a matching Böker Plus leather axe sheath.
Sharpening in the field

Knowing how to sharpen a hunting knife at the kitchen table is half of it. The other half happens outside, with cold hands. Most hunters notice it by feel first. The knife stops slicing and starts shoving. When that happens, sort it there and then, between animals, or the minute you've caught bone or dirt. A slightly rolled edge is back to new in a few strokes. Leave it, keep cutting, and it'll chip. Then you're back on the coarse stone at home.
Give the blade a wipe before you touch the sharpener, and another one after. The first gets the blood and fat off. The second makes sure none of the steel dust ends up on your venison.
You don't need much in the pack. One pocket sharpener, really, and a jacket pocket works too. The Accusharp SharpN'Easy has two ceramic stages; the Diamond Pro 2-Step pairs diamond with ceramic. Left yours in the car? Flip a mug over at the hunting lodge. That rough, unglazed ring on the bottom works like a fine stone if you alternate sides.
Is my knife sharp?
Please, not your finger. Plenty of better ways.
- Paper: grab a sheet by a corner, let it hang, slice downwards. Clean cut means you're there. Ragged or crumpled means you're not.
- Thumbnail: rest the edge on your nail at a low angle. It should catch. If it skates off, back to the stone.
- Light: look straight down at the edge. Nothing shining means the edge is even.
Passes all three? Sheath it.
When it goes wrong: common mistakes
Everyone hits at least one of these. Match your problem on the left.
| Symptom | Likely cause | Fix |
|---|---|---|
| No burr forms | Angle too low, or not enough strokes | Check the angle with the marker, then keep going on the coarse stone |
| Burr only near the heel | Belly and tip aren't reaching the stone | Lift the handle through the belly and stroke all the way to the tip |
| Cuts on one side, not the other | You held a different angle (or did more strokes) on one side | Even it up and count strokes per side |
| Sharp for one cut, then dull | Burr still on, folded over at the first cut | Lighter strokes, then the strop |
| Rounded edge | Angle wobbling mid-stroke | Ease off the pressure, slow down, or let a guide hold it |
| Rounded tip | Tip runs off the end of the stone | Finish every stroke with the tip still on the stone |
| Scratches on the blade face | Blade held too flat | Raise the spine and recheck with the marker |
Looking after your knife between hunts
A knife that's done three roe deer in a weekend deserves five minutes before it goes back in the drawer. Morakniv's own knife care advice says never to let a knife air-dry, and we agree.
- Warm water, then a towel, properly. If it's carbon steel, a thin smear of oil on top.
- Wet knife, leather sheath: bad pairing. The leather keeps the damp against the steel and rust follows.
- Give the edge its own space so it isn't rattling against other kit. A roll or a Morakniv knife bag works.
- Clean the stone too, with a brush and whatever you sharpen with (water for water stones, honing oil for oil stones). A stone that's gone hollow in the middle needs flattening, or every edge you put on it comes out curved.
A GunRange Look at Knife Sharpening
We sell knives in the same building where people shoot all day, and it changes how you look at kit. Nobody on the firing line cares how something looks on a shelf. They care whether it works. So for us, sharpening is just maintenance, like running a rod through a barrel. After every hunt, not in a panic the night before opening day.
Anyone can learn how to sharpen a hunting knife with some patience and the right tool for each step. That's why every step above names one, and they're all in one place.
Conclusion
It really isn't hard. Learning how to sharpen a hunting knife comes down to four things: find the factory angle, hold it, raise a burr along the whole edge, take it off. The rest is practice, and a bit of stubbornness.
Five minutes at the stone after each hunt saves a long, dull evening on the coarse stone when the season starts. And the next roe deer opens cleanly, first cut.
A dull knife slips — a sharp one does exactly what you ask.
FAQ
Push or pull: which way should you sharpen?
Honestly, either. Leading with the edge gives you a smaller burr. Leading with the spine is more forgiving while you're still learning to hold an angle, and holding the angle matters far more than direction. The one fixed rule: strop, and do your final burr-removing strokes, spine first.
Water or oil on a sharpening stone?
Check what the stone came with and do that. Water stones get soaked until they stop bubbling, usually 5–10 minutes; splash-and-go stones just want a splash. Oil stones get a few drops of honing oil, and diamond plates are happy dry or wet. Just never switch an oiled stone back to water. It won't forgive you.
No sharpener with you? What then?
Turn a mug or a plate upside down. The rough ring on the bottom isn't glazed, and it'll do the job of a fine stone if you stroke the blade across it, alternating sides. Good enough for a rolled edge. A properly worn blade still needs a stone at home.
Every tool for every step, from pocket sharpeners to guided stone kits, is in our Knife Sharpeners & Accessories collection. Pick yours and start the season with a sharp knife!